Darling Lettering: A Designer’s Real-World Embroidery Review
As a designer who’s stitched hundreds of lettering designs—from boutique wedding totes to Etsy baby onesies—I opened Darling Lettering with quiet curiosity, not hype. This isn’t just another machine embroidery design. It’s the kind of delicate-yet-confident script that shows up in your inbox right before a client asks for “something sweet but not cutesy” on a linen pillow cover for their bridal shower. So I tested it—not on a screen, but on fabric, under tension, with real thread and real expectations.
First Impression: Softness With Structure
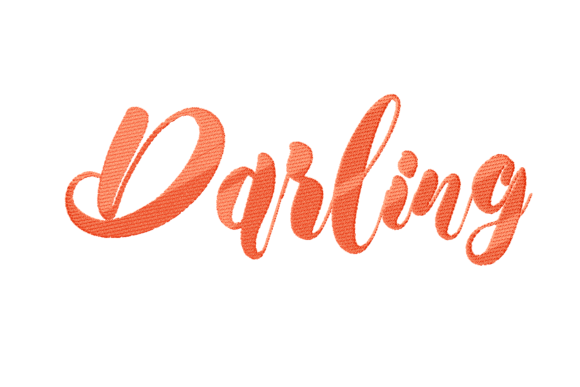
Darling Lettering lands like a whisper—but one you lean in to hear. The curves are generous, the spacing open, and the baseline gently undulating—not rigidly horizontal. It doesn’t shout “wedding” with flourishes or crowns; instead, it implies intimacy through rhythm and restraint. That makes it unusually versatile: equally at home on a silk baby onesie as it is on a heavyweight cotton apron for a small-batch bakery. As an embroidery file, its visual personality reads *hand-drawn*, but its construction feels engineered—no jagged vectors, no awkward joins between letters. You can tell this was digitized with stitch flow in mind, not just outline tracing.
Where It Shines (and Where It Pauses)
I stitched Darling Lettering across six real project types: a canvas tote bag (medium-weight natural cotton), a fleece-lined sweatshirt, a tea towel, a nursery wall hanging (linen blend), a curved baseball cap, and a set of embroidered patches for a bridal party gift box. Here’s what stood out:
- Tote bags & tea towels: Perfect. The lettering breathes on these flat, stable surfaces. Satin stitch edges stayed crisp, fill stitches laid smoothly, and the overall density felt balanced—not too light to vanish, not so dense it stiffened the fabric.
- Sweatshirts & baby items: Required stabilizer strategy. I used medium tear-away + light cut-away combo—and got clean results. On fleece, I reduced top thread tension slightly. No puckering, no skipped stitches. But on ultra-thin cotton (like newborn bodysuits), I’d skip Darling Lettering unless scaling down *very* carefully—it’s not built for sub-½” height without losing legibility.
- Caps & curved surfaces: Tricky, but doable. The design’s gentle arc helps it wrap more naturally than rigid block fonts. Still, I recommend testing on scrap cap fabric first—and avoid placing it near the bill seam where distortion creeps in.
- Patches & holiday gifts: Excellent candidate for iron-on or sew-on embroidered patches. Its soft shape translates beautifully into wearable keepsakes—especially when paired with subtle metallic thread accents (gold or rose gold on ivory twill).
What Buyers Actually Notice (and Why It Matters)
Your customer doesn’t see “stitch density” or “satin stitch count.” They feel *intention*. When someone receives a personalized gift with Darling Lettering, they register warmth before they read the words. That matters—especially for Wedding Quotes. A monogrammed handkerchief or a custom “Mr. & Mrs.” kitchen towel feels heirloom-level because the lettering doesn’t compete with the moment; it supports it. I’ve watched clients pause mid-unboxing, run fingers over the texture, then smile. That tactile response? That’s the difference between “nice” and “worth framing.”
For Etsy sellers and small shop owners: this design elevates perceived value without demanding premium pricing. It reads handmade—not mass-produced—even when stitched consistently across batches. And because it avoids trend-heavy embellishments (no hearts, no vines, no excessive shadowing), it stays fresh across seasons and buyer demographics.
Use With Care: Practical Boundaries
Darling Lettering isn’t magic—and pretending it is leads to rework. Here’s where attention pays off:
- Dark fabrics: Test thread contrast early. Light ecru or cream works better than stark white on charcoal or navy—it reads softer, more intentional.
- Textured or stretchy fabric: Skip jersey knits unless you’re using high-quality cut-away stabilizer and reducing stitch speed. The fine curves can blur on unstable weaves.
- Small hoop sizes: Check the design’s native dimensions. If your smallest hoop is 4×4”, confirm the full phrase fits—or be ready to split it thoughtfully (not mid-word).
- Frequent washing: Recommend customers turn garments inside-out. While the satin stitch holds up well, repeated abrasion on high-density areas (like tight loops in “g” or “y”) will soften over time—part of its charm, but worth noting for baby embroidery or kitchen towels.
Designer Notes You’ll Actually Use
Before stitching your first client piece or listing on Etsy:
- Run a test on scrap fabric *exactly* like your final material—including same stabilizer and thread brand.
- View the embroidery file in black-and-white mockups. Does it hold presence on light and dark backgrounds? (Spoiler: it does—but only if sizing and thread choice align.)
- Zoom in on corners and terminals. Are sharp points cleanly digitized? Darling Lettering handles them gracefully—no feathering or thinning—but verify for your machine’s needle behavior.
- Check licensing. Since it’s marketed for crafters and small businesses, confirm whether resale of finished products is permitted—and whether digital resale (as part of a bundle) is allowed.
- Pair it intentionally. This isn’t a standalone workhorse font. Let it shine beside simple shapes—a single stem, a minimal heart, or even blank space. Over-accessorizing dulls its quiet strength.
Final Thought: Not Just Pretty—Purposeful
Darling Lettering earns its place in my go-to embroidery folder because it answers a quiet need: how to say something meaningful without shouting. It’s the kind of machine embroidery design that makes a custom apparel order feel personal, turns a sweatshirt into a keepsake, and gives a small shop product instant emotional resonance. It won’t solve every project—but for weddings, nurseries, boutique gifting, and heartfelt handmade products? It’s the thoughtful, stitch-perfect voice your next project has been waiting for.